If you are an avid camper and don’t own a pie iron yet, here is a quick guide to pro campfire cooking with a pie iron that will not only change your mind but change your camping life!
A Little Old and a Little New
To most people, a pie iron is just for making grilled cheese while camping. It can, however, make so much more than slightly toasted bread. Pie irons have been around for over 100 years; however, Charles Champion patented pie irons in 1925. Made from cast iron, they are built to last.
These irons can withstand high heat and are prevalent in many cultures across the globe. They are known as jaffles, snackwich irons, or pudgy pie irons. Due to their outdoor popularity, the market is flooded with electric snackwich makers.
How to Look After a Pie Iron
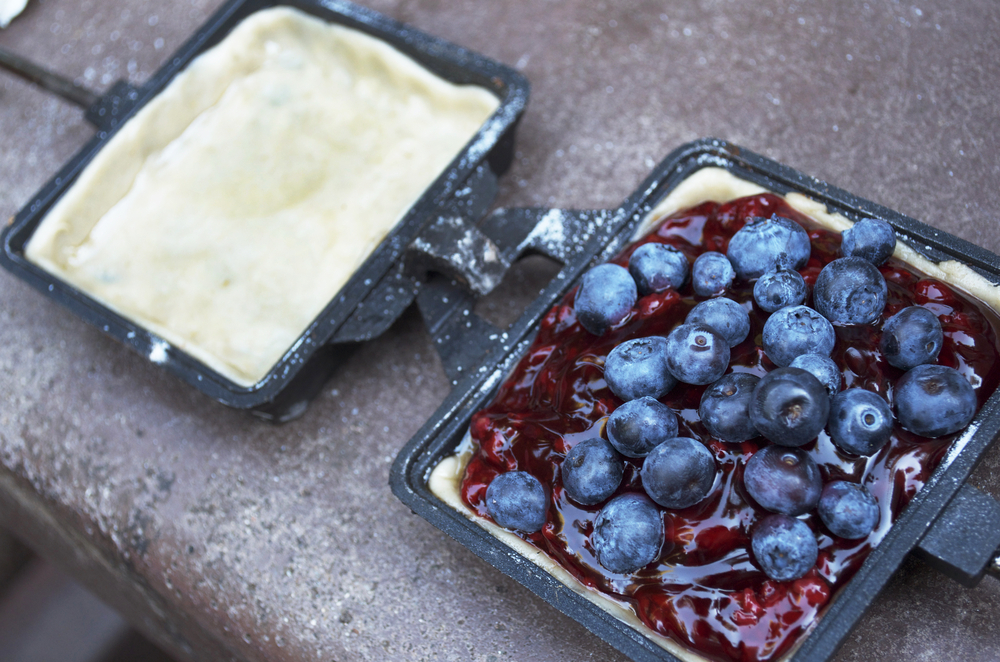
Like all things in life, pie irons can stand the test of time if looked after properly. Most pie irons have a hinge to hold the two shallow cast iron pans together and fireproof handles.
Looking after your pie iron might seem complicated at first. It truly isn’t. Just like the difference between an ‘okay’ pasta and a GREAT pasta is seasoning, the same rule applies to cast iron. All cast iron cookware needs to be treated by seasoning and sealing with oil to ensure it is nonstick and doesn’t rust.
How Do You Use Campfire Pie Irons?
Unless you have an electric pie iron, they are all made for campfire cooking! There are a few tips and tricks on how to get the perfect pie without burning your meal.
- Grate – Placing a stand or a grate in your fire to rest your iron will give you an even surface to rest your pie iron-on; this allows you to move the iron in circles to spread the heat out evenly, making it less likely to burn.
- Hotspots – The coals of fire are what cooks the meal. The flames can sometimes be a little too intense or harsh on food. Using the coals, you will ensure that there is an even dispersion of heat across the iron.
- Trimming – When making any pies or bread, you will need to cut the edges so that nothing sticks out of the pie iron. If anything does, it is likely to catch fire and burn.
- Checking – Never be afraid of checking to see how your pies are progressing. Pop your iron open to see how long you have left; this is not a unique cake that can flop if you open it.
- Grease – Grease or cooking spray your pans; this is important; you don’t want to craft a gorgeous pie and then end up scraping it off the bottom of your pan and into the bin!
- Paper towels – Cleaning a pie iron shouldn’t involve elbow grease, sweat, and tears. Simply wipe it down with a paper towel or a cloth. Don’t soak for long periods of time as this will cause rust to build up!
- Fun – This is the most crucial ingredient to any pudgy pie. Have fun, experiment, and try cooking anything in your pie iron; you might just be surprised.
More Than Just Pie
Pie irons are not just for mountain pies. Breakfasts, casseroles, desserts, even campsite steaks are all on the menu for your next camping trip. They are easy to use and lightweight. Many pie irons have detachable handles to allow for easy packing; some pie irons have a metal loop that clips it on to your backpack.
The compact nature of a pie iron means it is easy to transport while hiking a trail. Instead of lugging big and clunky pots around, a pie iron is neat, compact, and fits into most backpacks with ease. Just make sure you wipe it clean with a paper towel or a cloth and allow it to cool down completely before packing!
Recipe Ideas for the Campsite

Many happy campers find that breakfast is their favorite meal. To some campers, breakfast is a treat; they will hike to new horizons. There is often nothing better than sipping coffee while the bacon sizzles. Here are a few breakfast ideas to try with your pie iron.
Breakfast of Champions
The beauty of a pie iron is that you can use it as two pans for making a full grilled breakfast.
Ingredients:
- 4 slices of bread
- 4 rashers of bacon
- 2 thick slices of tomato
- 2 -4 eggs
Method:
Grease both sides of your pie iron. Place both sides onto a stand over the coals to heat up. Once heated, cook your bacon and eggs as you would normally. Pop your tomatoes in next to the bacon, grill both sides to perfection. Once the bacon is crispy and the eggs are cooked, plate onto plates. Toast the slices of bread in the bacon grease.
For a frittata/omelet: cut the bacon and tomatoes into bits, add seasoning and pepper. Beat the eggs into the bacon and pour the mixture into a greased and heated pie iron; use both sides to make more than one portion at a time. Serve while hot with a slice of fresh bread.
Bacon and Cheese Grilled Sandwich
Mountain pies with bacon and cheese, swap the bacon out for salami slices for a pizza style pie!
Ingredients:
- 4 slices of bread
- 1 pat of butter
- 2 rashers of cooked crisp bacon, or 8 pieces of pepperoni
- 1/2 cup of shredded cheese
Method:
Place two slices of bread on one side of a greased pie iron. Place cheese on top of the piece of bread, top with pepperoni/bacon slices. Close the sandwiches with another two slices of bread. Close the iron, and place it on the campfire for 5 minutes, turning regularly. The bread should be golden brown and crispy.
The Proof is in The Pudding
Try experimenting with pie crusts and pie fillings, breakfast, lunch, and dinner wraps. The art of cooking with a pie iron is not as complicated as indoor cooking. After all, camping is about enjoying life outside, and cooking on a campfire should be fun for everyone.

Leave a Reply